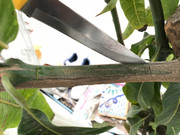
Did one alampur baneshan on Kent root stock this morning and took some photos. I cut a box on the bark a little larger than the scion width and length. To pop out the bark and not bruise the periphery bark, I cut a centerline then pried out the bark by wedging the knife into the centerline and tilt it.
cut the outline:
Pry the bark from the centerline:
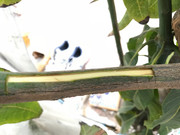
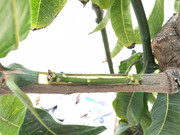
Then peel the park out clean. No risk of under or over cut the cambium:
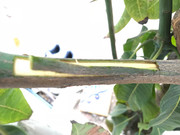
Make a flat cut on scion to expose the cambium layer (1/8 to 1/4 thickness of scion. don't go too deep; I prefer a thinner cut for a centerline cambium as long as most cambium are seen. A deep cut results in two-line cambium on both side of centerline and these maybe not align well with a rootstock curved surface cambium. don't be too worried this works most of the time.):
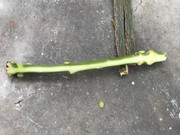
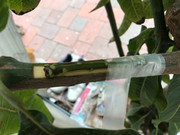
Lower scion down to grave then line up the scion end to the end of the hole (not shown in pic) for fusing the ends together weeks later as the bark grow: (This skinny Alampur scion has no terminal bud b/c it had flower stalk 5 months ago.)
Wrap up from toe to head to prevent dried out with your favorite tape. I used household plastic bag whatever around:
This is a LZ grafted a week ago in grave/coffin style and coffin is pushing:
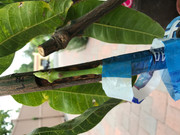
Edited: After about a week I untape the head to check and if the bud is pushing then I only tape back up to the node to expose the new grow. On sunny location I taped up a piece of white paper around the scion to shield the sun.
On this pic you can tell I used the blue/clear plastic cut from the discarded water bottle wrap. I like its strength and stretch characteristic.

